
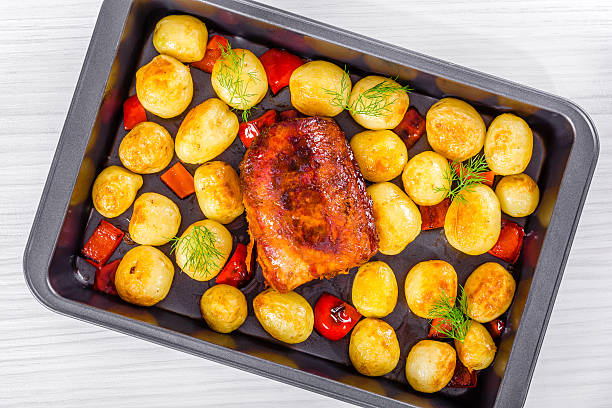
The Brits get a bad rap for their cuisine, and in some cases rightfully so–the beef cooked until gray and the gravy-made-from-granules that I ate every Sunday while staying in England were not the height of culinary greatness– but dang, if there aren’t a lot of things they do better than almost anyone else. I’m talking about savory pies, fried fish, Yorkshire puddings, and roasting potatoes. It’s the British technique of roasting potatoes that is one I’ve taken awe of. It’s easy to follow and yields incredible results. Cook chunks of potatoes until they’re tender. Toss them using fat (ideally beef drips) to roughen their surface. Then, roast until they’re golden and bubbling.
The roughing-up and boiling steps are the most critical steps. They produce the tiniest mixture of mashed potatoes that sticks to the surfaces of the potato chunks and then crisps beautifully in the oven when the potatoes cook. This is the method I employ to prepare this recipe, the Crispy Ultra Roast Potatoes recipe I shared in the year 2011, and also the method I use for almost every holiday.
In the past, I chose to review the process starting from scratch to ensure-creamy contrast is maximized within each roast potato. I tried trying and retesting every aspect, from cut size to potato variety to roasting and boiling. The outcome is this recipe which I confidently and humbly believe will yield the best sweet potatoes that you’ve eaten that are incredibly crunchy and crisp to the touch but with insides that are soft and full of potato flavor. I challenge you to cook these and not be awed by these potatoes. I double-dare you.
Choosing the Right Potato Size and Variety
The first thing to do is discuss the size. In my original recipe for roasting potatoes, I cut my potatoes into smaller 2 inches chunks. This time I wanted to increase that contrast in the middle and exterior and chose to cut the potatoes in large pieces. The equivalent of a quarter potato for each. Each piece will turn into a two-biter. But it is easy to crisp them.
To give you a variety, I tested three of the most popular types in the supermarket: russet Yukon Gold and red.
Russets have the most crisp crusts and roast to a pale golden brown. Their interiors are soft and soft.
Yukon Golds roast slightly darker because of their lower starch content and more sugar content. This results in more excellent flavor, but it also results in a more brittle crust. The insides are delicious and smooth, with lots of flavor.
The red potatoes roast incredibly dark due to their deficient levels of starch; however, they have difficulty getting crisp. They emerge from the oven with a crunchy texture. However, they soon lose that crunch and turn soft and soft.
It happens when you press the russet and the red potato for about two minutes after they have come from the oven.
Moral of the story: Avoid the reds. Use Russets instead and Yukon Golds (or a mix! ).
Playing with pH How to Control pH: Why You Should Include Baking Soda in Your Water
In my previous recipe for roast potatoes, I advised adding some vinegar to the Water before the initial boiling. The goal is to stop the degrading of pectin, the celluloid glue that holds the vegetables together. Imagine your pectin as a brick’s mortar.
Pectin starts to break down at 183 deg F (84degC). However, the breakdown process is affected by the acidity of the cooking media. Lower the pH (i.e., the less acidic) and the lower it is broken down. The more acidic it is (i.e., that is the alkaline), the faster it is broken down.
To illustrate this, I prepared four potatoes with different pH levels ranging from moderately acidic neutral to highly alkaline. The potatoes cooked in more alkaline water begin breaking down faster than those boiled in acidic Water.
It turned out that the potatoes cooked in alkaline waters were better than those cooked in vinegary waters. Because the pieces are large, they are not as problematic for smaller potatoes. In addition, the alkaline Water can help the outer layers of the potatoes break down further, which results in a lot more than the starchy slurry, which results in a crisper exterior. A half teaspoon of baking soda to two-quarters of a quart of Water was just right.
This is the level of starchy paste that you’re looking for on the exterior of these potatoes following roughing them up.
Cold Starts Make me cold: Begin with cold Water as opposed to
Another thing to consider is the method by which the potatoes are cooked. In most potato dishes, I would suggest starting them with cold water before boiling them to the point of boiling. This ensures that the exteriors do not mush before the insides are cooked. This particularly applies to larger chunks of potatoes, as it can take a long time to get into the middle.
Here we’re playing an entirely different ball game. We want the outer surfaces to break down better than the middle. This means that we should cook the potatoes in Water that is already boiling. I ensured that I added salt to the Water (about one teaspoon of kosher salt per 2 quarts of Water) to flavor the potatoes while they cooked.
How Long Should You Roast Your Potatoes?
The roasting part is the most accessible yet challenging aspect because potatoes differ significantly. For example, look at the two Yukon Gold potatoes I cooked and then roasted precisely the same way. The only difference is in the place that I bought them from. The time it took for that one to turn brown completely while that on the other side was light. This is due to the amount of sugar and starch in potatoes, which fluctuate according to the season and the time that potatoes were stored and in what way.
You can still make fantastic oven-roasted potatoes. You’ll need to depend on your nose and eyes with a timer as a rough reference.
I discovered that roasting the potatoes nicely and hot at the temperature of 450degF (230degC) was the best, and with convection turned on, they turned out better. (When using convection, I lowered the temperature to 400degF (200degC) to keep the edges from splitting.)
The potatoes can be delicate, and attempting to shake them too quickly could cause the bottoms to stick to the pan.
However, roasting them without moving them can result in uneven cooking. I noticed that if I let them in the pan for about 20 to 30 minutes, I could then use a spatula made of metal (or my fingers) to pull them off the pan and give them a chance to flip. Then, they’ll require another 30 to 40 minutes for a shake and flip in the middle. I prefer to let them develop excellent and dark to enhance the contrast between a smooth exterior and a soft center.