
This is the recipe you need to make CWA Pumpkin Scones in an old-fashioned manner (just like ). Easy pumpkin scone Recipe.
This is a Country Women’s Association classic.
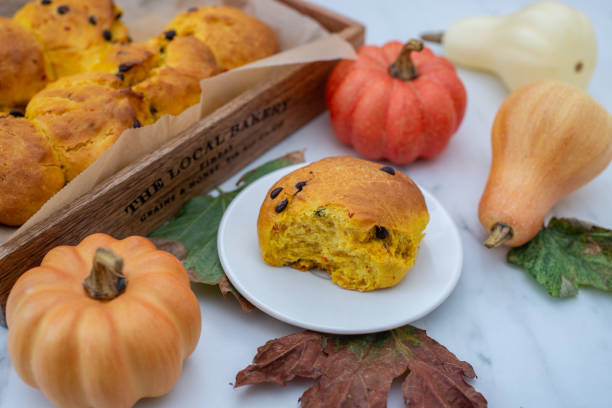
Old-fashioned pumpkin scones
Aren’t cravings funny? I sometimes wonder how my body can suddenly crave something I haven’t thought about in years.
My second pregnancy was full of these moments.
When I was 11 weeks pregnant with my second child, I was getting prepared to take a friend to lunch who had just given birth.
I had lunch planned for 40 minutes, but I suddenly felt like having a sausage.
It had been a long time since I bought a sausage, but I went to our local and paid for it. I then ran to my car, and I was already eating one before I even turned the ignition.
As soon as I stepped out of my car, I had to remove the crumbs from the floor to conceal the evidence.
I’m serious! It was a good thing no one saw it.
You might also enjoy Lemonade Scones if you want an easy scone recipe
Every few months, I crave scones. I’m not pregnant and think about them until I have my fix.
My children also love them.
This good old-fashioned pumpkin scone recipe comes from the Scone Recipe Book.
There is a whole book of CWA recipes for scones.
The old recipes could be more specific, which is what I like about them.
In the 1940s, there was no such thing as a hand-holding. Recipes state temperature by saying ‘in a warm oven’ and cooking time with “until done.”
The only way to do everything was by hand.
They didn’t risk being sued if someone burned themselves in the hot oven or set the house ablaze while cooking them “until they were cooked.”
You may also enjoy my Harvest Pumpkin Cake
When I make these, however, I follow the recipe precisely and use my hands to mash the butter and the flour together.
As you can imagine, the kids also enjoy making pumpkin scones.
I must breathe through this mess.
The pumpkin scones were better after I got my hands dirty.
It must be the love and effort (although I also have other delicious recipes).
These are fluffy, light, and delicious. I can almost hear my cravings re-starting in the back of my head (no, I am not pregnant!) ).
You can find the recipe for old-fashioned pumpkin scones at the end of this article.
This recipe is so simple! This recipe is just right for me!
There were so many possible problems – scones that didn’t rise or scones which were crumbly and dried (I would say that the solution is to add more cream!) The scones were too crumbly and dry (Id say more cream is the solution!
I have compiled a list of some common problems you may encounter when baking scones so that you can make perfect pumpkin scones for the first time.
Why did my scones not rise?
If you are craving a good, fluffy scone, there’s nothing worse than taking scones from the oven and finding that you have baked a whole tray of dense pancake-like scones.
Why did your scones not rise and go flat? This could have happened for several reasons.
why your scones did not rise
Over-kneading is the most common cause.
If you have ever made bread, you will know it is essential to knead your bread to activate the gluten. This helps the bread hold together better and become stronger.
We want something else with our scones.
The dough should still be slightly wet. You can start by kneading the dough until all just has come together.
The cutter was twisted. Flouring the edge and gently pressing it into the dough when cutting scones is essential.
The cutter can be turned to make them rise unevenly, resulting in the cutouts not rising as high as you would like. See this in action by watching the Video below.
You did not bake them all close together.
After cutting the scones, place them on a tray so they are gently kissed (but not too closely – watch the Video below).
The internet was my saving grace when I had pumpkin in the refrigerator and no idea how to use it. The recipe for pumpkin scones was simple to follow and delicious! I also took pictures of the entire process. Thanks for sharing.
Scones are very kind. They lift each other as they rise, so placing them close together will help create a good rising.
There are many more reasons, but I will only cover this one – you may not have used suitable baking or self-raising powder (if you use plain flour).
It’s easy to test (whether baking powder or SR) by putting a small amount in water or white vinegar.
It’s okay if it fizzes, but you should get some fresh baking powder if it doesn’t.
Watch the Video to see how to cut the scones into small pieces and arrange them neatly.
Ignore any toddler who wants to play with their car in the dough.
Connect with Claire K Creations
Follow me on social media to always get an update!
Follow me on Facebook, and use the hashtag @clairekcreations to show me your wonderful Claire K Creations creations & recipes!
A fun group has been created on Facebook, and I would love to have you join! You can share your favorite recipes, tools, tips, and tricks for simplifying motherhood and learn what’s new at Claire K Creations. You can join us here if you want to see it.
Instructions
Heat the oven to 180C (356F). Line a baking sheet with baking paper.
Sift flour into a large mixing bowl.
Rub the butter in with your fingers until it resembles breadcrumbs. Add the sugar, whisk through, and then add the butter.
Add the pumpkin, egg, and milk. Fold them all through.
Then flour your hands, and pat the dough to a thickness of about 2 or 3 cm.
Cut out circles with a round cookie cutter that has been floured and arrange them so they touch the tray.
Pat any excess dough gently together, then let it rest for a few moments. Then pat out and cut more circles.
Bake the scones for 10-15 minutes until golden.
Then, either cool them on a rack or eat them immediately with jam and whipped cream.