
I built a Gingerbread House to host my family’s Christmas dinner this year. Apart from the fact that tins full of lentils I used to stabilize the walls sank into the house (I did not realize they were in the place when I put up the roof), the house ended up a little unbalanced when I drove to my mother’s home (hence the ribbon), I was happy with the results. It was especially so, considering it was the first time I had attempted this.
After a 12-course Christmas meal, There was not much to eat for dessert. Therefore, after all the efforts to create my Gingerbread residence (I even made a snowman! ), The only thing left was the chimney, and around 1/8th of the roof was removed.
Then I decided never to make another Gingerbread House again unless I was traveling where there were 50 of us! As Christmas approached this year, I began contemplating making something using gingerbread because I love gingerbread. It’s the only occasion of the year that I bake it. It screams my Christmas. Since this is the first Christmas on this blog, I thought sharing an edible present recipe would be nice. Something different.
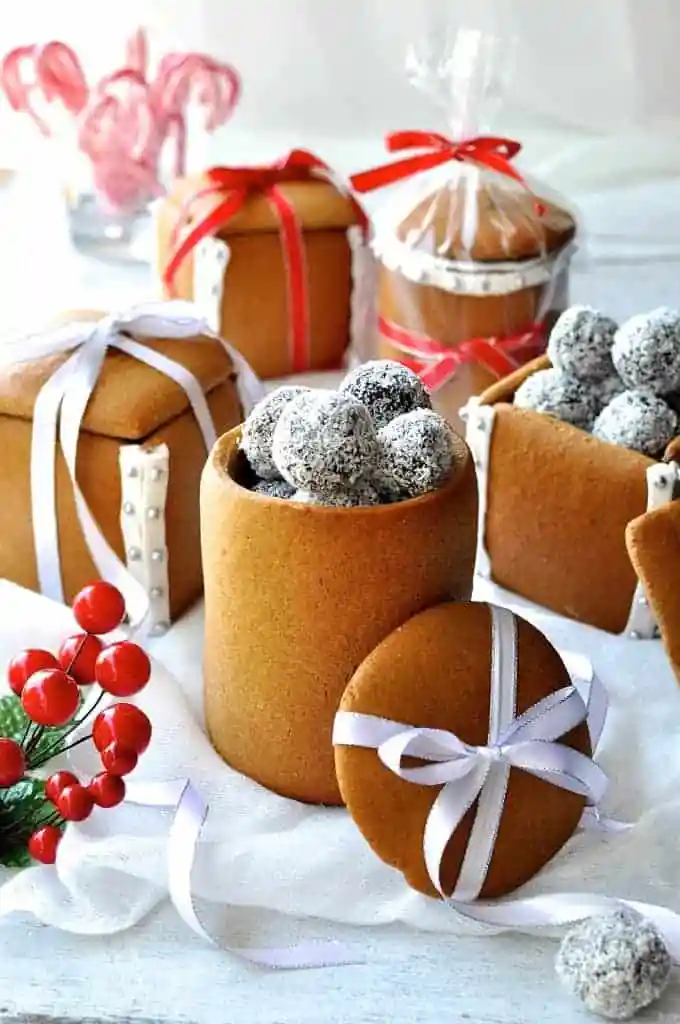
That’s how the idea for”the Gingerbread Boxes and Mason Jars was created. It’s a more practical size than a gigantic Gingerbread House that takes an army of people to consume. A product that is easy to transport can be packaged neatly and is easy to create (because I’m not one to make anything difficult! ).
It took a few attempts to find the right recipe. I found only an ingredient for Gingerbread Boxes on a commercial recipe website. I won’t go into the details, but suffice it to say it was not working. Therefore, I decided to come up with one of my own.
Let me first ensure you they are straightforward! They take time. However, they’re not too difficult. Don’t let the lengthy instructions make you think otherwise! I jammed two recipes together (i.e., The Boxes or Mason Jars), and it took a long time to describe what to do with the dough into pieces and build the boxes.
Instructions
Put brown sugar, butter, and honey into a smaller pot at a low temperature. Stir until butter melts and sugar dissolves. Put aside until nearly at temperature. (Note 1)
Place the mixture in a bowl of a large size and then put in the egg. Mix until it is well combined.
Mix the rest of the Gingerbread ingredients directly in the bowl. Mix until the elements are well combined using your hands to work it several times in the bowl to bring all the ingredients together. (Put it on the work surfaces if your bowl isn’t big enough).
Make a disc of dough, wrap it, put it in cling wrap, and put it in the fridge for 1.5 hours. (Note 2)
Remove the dough from the refrigerator. For easy handling, Cut the dough into two pieces. Utilize a rolling pin to make it 3mm or 1/10″ in thickness, sandwiched between two sheets of baking (parchment) paper. Refer to Note 3 for a simple method of doing this.
Follow the directions to create Boxes as well as Mason Jars.
PREPARING AND BAKING BOXES
Bake at 180C or 350F. Place one oven shelf located in the middle and one directly beneath it.
Line two baking trays with baking parchment (parchment newspaper).
Cut 12 squares out of the dough that measure 8cm x 8cm (3″ x 3″). Place them on a baking tray.
Optional: Cut 2 small squares to be used as your “knob” in the center of the lid. Place small squares in the middle of two squares.
Bake between 12 and 15 minutes until golden brown. The top tray should be ready in 12 minutes. The bottom tray should take close to fifteen minutes (move it onto the upper shelf after you remove the full tray).
CONSTRUCTING BOXES
After the squares have cooled after cooling, pick eight yards that will form your boxes’ walls. Line them with the sides of your face and place the flat sides facing down onto the table (i.e., which side was placed on the baking tray).
Cut with a knife the right and bottom sides of each rectangle (to ensure the edges are flat, making it easier to construct).
Use a knife to spread chocolate that has been melted on the edge on the right (that you cut) from one of the squares (Square A). Place the square on its back where the lower edge (that you miss) is level across the surface of your work.
Take the second rectangular piece (Square B) and then hold it up to ensure that the edge with the lowest cut lies on your work area. Attach the bite of the chocolate on Square A to the flat surface of Square B (i.e., the one on the baking pan). Take 20 seconds, allowing the chocolate to harden slightly.
Use a knife for Square B to spread chocolate across the right edge you cut. Attach that to another square. Then repeat until you’ve built the walls of your Box. Repeat the process for the following boxes.
When the walls are forming, make two additional squares. Cut them in half with a sharp knife to ensure they’re the correct size to fit into the walls. This is the Base of the Box. Sprinkle a bit of chocolate around all the sides of the rectangle, then grab the walls and put them on top of the Base. Push it down to make sure the Base fits into the walls.
Use Royal Icing to hide the edges and decorate as you wish. I used silver sugar balls. Add the decorations once you make sure the Royal Icing is wet.